The Alchemy of 00 Flour: Why It’s the Gold Standard
So, let’s talk about 00 flour. If you’ve dipped your toes into the world of pizza-making, you’ve probably heard about it. It’s like the holy grail for dough enthusiasts. But what’s the deal with this flour, and why is it so revered? Let me break it down for you in a way that’s easy to digest (pun intended).
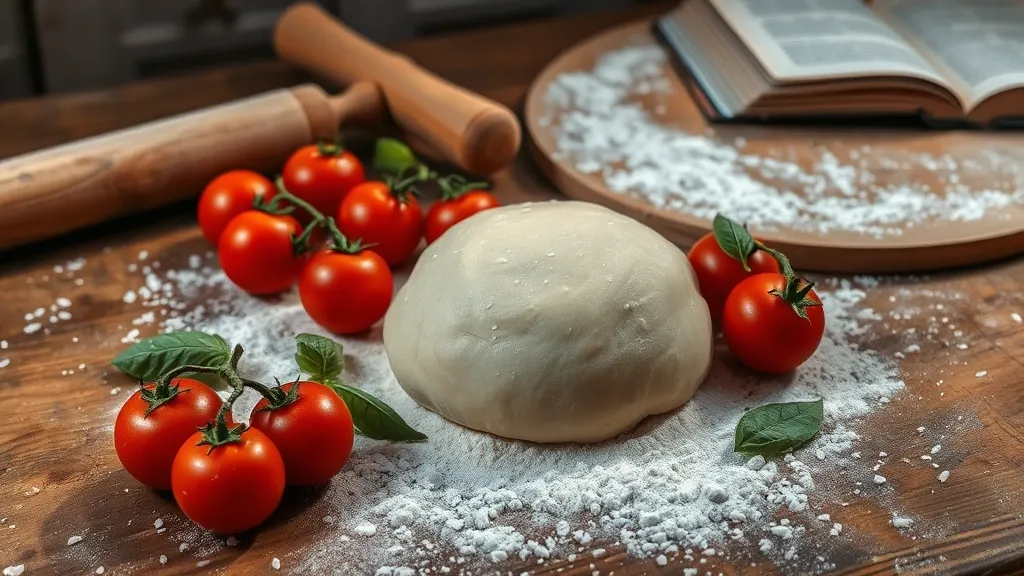
First off, 00 flour isn’t just a fancy name. It’s a specific type of flour that hails from Italy, and the number refers to how finely it’s milled. The finer the flour, the lower the number. So 00 is like the VIP of flour. It’s super soft, with a protein content usually between 11% and 12.5%, which is just perfect for making that stretchy, chewy crust we all crave. It’s like the dough knows it’s destined for greatness!
- Texture: The fine grind gives pizza dough that silky texture. You won’t get that with regular all-purpose flour, trust me.
- Hydration: 00 flour has a great ability to absorb water, which means you can get a dough that’s moist but not sticky. It’s like magic!
- Flavor: There’s a subtle nuttiness and sweetness that comes through when you use 00 flour. It’s like the flour has a personality. Who knew flour could be so interesting?
Now, some folks might argue that you can get away with all-purpose flour or even bread flour. And sure, you can make a decent pizza dough with those. But if you’re aiming for that authentic Neapolitan pizza experience—think wood-fired ovens and a bubbling crust that has those gorgeous leopard spots—then 00 flour is where it’s at. It’s like trying to play Beethoven on a ukulele instead of a grand piano. Both can make music, but one’s just gonna give you that full experience.
But here’s the kicker: 00 flour isn’t just about the end product; it’s about the process too. When you handle 00 flour, it feels different. It’s like working with luxurious silk compared to regular cotton. Plus, you’ll feel like a true pizzaiolo (that’s Italian for pizza maker, by the way) every time you stretch and shape that dough.
In short, 00 flour is the gold standard for pizza dough because it elevates your pizza game to a whole new level. If you’re serious about your homemade pizza, do yourself a favor and get your hands on some 00 flour. You won’t regret it. Trust me, it’s worth the investment!
Knead for Speed: Mastering the Art of Dough Preparation
Alright, let’s talk about the heart and soul of any good pizza: the dough! I mean, without that chewy, crispy goodness, we’re just looking at some sad toppings on a plate, right? So, rolling up our sleeves and getting into the nitty-gritty of dough preparation is where the magic happens.
First off, let’s get one thing straight. Kneading isn’t just about working out your biceps (though, hey, bonus if that happens!). It’s all about developing gluten, which gives your pizza that perfect chewy texture. If you’re like me and totally new to this, don’t worry; it’s not as scary as it sounds. Just think of it as your dough workout session!
To kick things off, combine your 00 flour and water in a large bowl. I know, it sounds simple, but trust me, the magic is about to happen. You’ll want to mix until it’s all combined, and it should look a bit rough and shaggy at this point. If it looks like a hot mess, you’re doing it right! Just don’t forget to add a pinch of salt—this isn’t a dessert, folks!
Now, here comes the fun part: kneading! Turn that shaggy mix onto a floured surface and start pushing and folding. You can pretend you’re a master chef in Italy or just a person really passionate about pizza (which is totally valid). Knead for about 8-10 minutes. If you’re feeling adventurous, throw in a little dance move while you’re at it. Why not, right?
- Push the dough away from you with the heel of your hand.
- Fold it back over itself.
- Turn it a quarter turn and repeat.
Don’t be afraid to get a little messy. Flour will fly everywhere, and you might end up with dough stuck to your hands (and probably your face too!). But hey, that just means you’re doing it right. And when you’re finally finished kneading, the dough should be smooth and elastic. Give it a little poke—if it springs back, you’ve nailed it!
Time to let that dough rise! Place it in a greased bowl, cover it up, and let it chill for about an hour or until it doubles in size. This is the perfect time to catch up on your favorite show or grab a snack. Just don’t forget about your dough, or you might end up with a dough monster! (Okay, maybe not, but you get the idea.)
Once it’s risen, punch it down gently (yes, you can take out some frustrations here) and shape it into balls. These will be your future pizza masterpieces. Just remember, the more love you put into this process, the better your pizza will taste. So, knead with passion, and let’s get ready to create some pizza perfection!
Rise and Shine: The Secrets of Fermentation and Flavor
So, let’s talk about fermentation for a sec. I know it sounds a bit science-y, but trust me, it’s basically the magic behind that fluffy, airy pizza crust we all crave. When you mix flour, water, yeast, and a little salt, you’re not just making dough; you’re starting a tiny party of microorganisms that are about to do some serious work. It’s like giving your dough a mini spa day.
The yeast starts munching on the sugars in the flour, and as they feast, they produce carbon dioxide. That’s what makes the dough rise! Honestly, it’s kinda wild to think about it—your pizza is literally being lifted by little hungry critters. And let’s be real, that’s pretty impressive for something that started out as just flour and water.
Now, don’t rush this process! I know we live in a world where everything is instant (hello, microwave popcorn), but good things take time. Letting your dough ferment for a longer period, like overnight or even up to 72 hours in the fridge, can make a huge difference. It allows for deeper flavors to develop. Think of it like letting a good wine breathe. The longer it sits, the better it gets. Plus, the longer fermentation can make your dough easier to digest. Win-win!
Speaking of flavor, this is where things get exciting. If you’ve ever bitten into a slice of pizza with that perfect crust, you know what I mean. That subtle tang? Yep, that’s the result of fermentation too! The lactic acid bacteria come in during the fermentation process, and they add complexity to the flavor profile. It’s like having a flavor party, and everyone’s invited.
- Tip: If you’re feeling adventurous, try adding a bit of sourdough starter to your dough. It kicks up the flavor even more!
- Pro Tip: A little olive oil can help with texture and flavor too. Just don’t go overboard, or you’ll end up with a greasy mess!
So, next time you whip up a batch of pizza dough, remember that fermentation is your friend. Give it time and let those flavors develop. You’ll be amazed at how a little patience can turn a simple pizza night into a culinary masterpiece. And who doesn’t want to impress their friends with homemade pizza? Just make sure to save them a slice or two… or three!
The Final Countdown: Baking Your Way to Pizza Glory
Alright, folks, it’s time for the grand finale! You’ve mixed, kneaded, and let your dough rise like a champion, and now it’s time to bake that masterpiece. This is where the magic really happens, so let’s dive into the nitty-gritty of turning your dough into pizza glory.
First things first, you want to preheat that oven! I’m talking about cranking it up to the highest temperature it can go, usually around 500°F (or 260°C for those who like to keep it fancy). If you’ve got a pizza stone, toss that baby in there while the oven heats up. The stone absorbs heat like it’s going out of style, and it’ll help give you that crispy crust we all dream about. If you don’t have a stone, no worries—your trusty baking sheet will work just fine. Just make sure it’s hot, hot, hot!
Now, let’s talk about shaping your dough. This is where you can really show off your skills (or lack thereof). Some folks go for the classic toss in the air, while others prefer the gentle stretch method. Honestly, I’m more of a “let’s not make a mess” kind of person, so I usually opt for the stretch. Just remember, don’t overwork it! You want a nice, airy crust, not something that resembles a flat pancake.
- Don’t forget to dust your surface with a bit of flour or semolina. This helps prevent sticking and adds a nice touch of flavor.
- If you’re feeling adventurous, try adding some garlic or herbs to your crust for an extra kick.
Once your dough is shaped and ready to go, it’s time to load it up with your favorite toppings. I’m a simple gal (or guy), so I usually stick with classic tomato sauce, mozzarella, and a sprinkle of basil. But hey, if you wanna throw some pineapple on there, who am I to judge? Just remember, moderation is key. Too many toppings can weigh down your pizza and leave you with a soggy mess.
Now, slide that beauty into the oven and let it work its magic! You’re looking at about 10-15 minutes of bake time. Keep an eye on it, though. Every oven is a little different, and you don’t want to end up with a charred disaster. When the crust is golden brown and the cheese is bubbly, you know you’ve hit the jackpot.
And there you have it! Once your pizza is out, let it cool for a minute (if you can resist the temptation) before slicing it up. Enjoy your creation, and don’t forget to take a pic for the ‘gram. After all, this is pizza glory we’re talking about!