Whipping Up Whimsy: The Egg White Alchemy
Alright, let’s dive into the magical world of egg whites. Seriously, it’s like a whole new universe just waiting to be explored. You know those little white guys? They might look simple, but once you start whipping them, it’s like they’re transforming into something out of a fairy tale. And that’s the beauty of pavlova, right? It’s all about that light, airy texture that makes your heart sing.
First things first, you’ve gotta get your egg whites nice and frothy. It’s like giving them a mini spa day. I mean, who doesn’t want to feel pampered? Use a clean bowl—like, really clean. Any trace of grease or yolk can totally mess up your meringue game. Trust me, it’s not pretty when that happens. I once thought I could skip the cleaning part and ended up with a soupy disaster. Lesson learned, folks!
Now, when you start whisking, don’t rush it. It’s like a slow dance—take your time and let the magic happen. I usually use a hand mixer, but if you’re feeling ambitious, go for the whisk and get those arm muscles working! You want soft peaks at first, which means the mixture should hold its shape but still be a bit wobbly. It’s like that moment when you’re trying to decide if you should stay up late binge-watching your favorite show or get some sleep. Tough call!
- Soft Peaks: Think clouds—fluffy but not too stiff.
- Stiff Peaks: This is when you can hold the bowl upside down without anything falling out. Don’t try this at home until you’re sure!
Once you’ve got those soft peaks, it’s time to add your sugar. But don’t just dump it all in at once. Gradually sprinkle it in, whisking all the while. It’s like adding sprinkles on a cupcake—you want it to be just right. The sugar helps stabilize the egg whites and gives that glossy finish that makes pavlova so dreamy. You know, the kind of glossy that makes you want to take a million pictures for Instagram.
Keep whisking until you reach those stiff peaks. This is the moment you’ve been waiting for! Your meringue should look shiny and smooth, like a mirror. And here’s a little secret: if you can hold the bowl upside down and it stays put, you’ve nailed it! Just be careful not to challenge your friends to this test unless you’re super confident—nobody likes a mess!
So there you have it, the egg white alchemy that makes pavlova what it is. It’s a bit of a dance, a sprinkle of patience, and a whole lot of love. Now, let’s get to the baking part, shall we?
Sugar: The Sweet Science of Stability
Alright, let’s talk about sugar. I mean, what’s a pavlova without it, right? It’s like a party without a DJ—just kinda sad. When it comes to making that perfect pavlova, sugar isn’t just a sweetener; it’s basically the backbone of the whole operation. It’s what gives our meringue that glossy finish and helps hold everything together. You know, like the friend who always makes sure everyone gets home safe after a night out.
Now, there are a few types of sugar you might consider. Granulated sugar is the go-to for most, but some folks swear by superfine sugar. It dissolves quicker, which means a smoother meringue. Less grit and more glam, am I right? But really, if you’ve got regular granulated sugar on hand, you can totally make it work. Just give it a good whiz in a blender for a few seconds if you want to up your game.
Here’s where it gets a bit nerdy (but stick with me, it’s kinda cool). Sugar helps stabilize the egg whites as they whip up. Basically, it creates a sugar syrup that coats the proteins, preventing them from deflating. It’s like a protective bubble, keeping everything nice and fluffy. No one likes a sad, deflated pavlova, trust me. It’s like showing up to a party with a flat tire—nobody wants that.
- Tip: Add your sugar gradually! Tossing it all in at once is a rookie move. Sprinkle it in while you’re whisking, so it has time to dissolve properly.
- Pro tip: If you wanna take it up a notch, consider adding a pinch of cornstarch and vinegar to your mix. This combo helps to create that chewy marshmallow center we all love.
And let’s not forget about the flavor. I mean, sugar is sweet, but it also enhances the other flavors in your pavlova. It’s like the hype man for your dessert. So, whether you’re topping it with fresh fruits or drizzling some chocolate sauce, sugar is there to make everything pop.
In the end, mastering sugar is key to nailing that pavlova. It’s a sweet science, and once you get it down, you’ll be the pavlova queen (or king) of your kitchen. Just remember, a little patience goes a long way. So, put on your favorite tunes, grab that whisk, and let’s get sweet!
The Dance of the Oven: Baking with Precision
Alright, let’s talk about the oven. You might think it’s just a big metal box that heats up, but oh boy, it’s way more than that. It’s like the stage for your pavlova performance, and trust me, you want everything to go smoothly. The secret to a perfect pavlova lies in understanding how your oven behaves. Every oven is a bit of a diva, you know? Some run hot, some run cold, and some just have their own agenda. So, it’s super important to get to know yours.
First off, preheating is key. I mean, you wouldn’t waltz into a dance without warming up, right? Set that oven to a steady 120°C (250°F) and let it do its thing for at least 20-30 minutes. This ensures the temperature is just right for those egg whites to rise and create that fluffy cloud we all dream of. And don’t even think about opening the door too early! It’s like interrupting a ballet mid-performance; it just throws everything off.
Now, when it comes to baking time, patience is your best friend. Generally, a pavlova needs about 1 to 1.5 hours in the oven. I know, I know, it feels like an eternity when you’re waiting for something as delicious as this. But trust me, it’s worth it. You want that lovely, crisp outer shell while still keeping the inside soft and marshmallowy. If you rush it, you might end up with a sad, deflated pavlova—nobody wants that!
- Keep an eye on it for the last 15 minutes. You’re looking for a light golden hue.
- If you see cracks forming, don’t panic! A few cracks are totally normal and can even add character.
- Once the time’s up, turn off the oven but don’t take it out just yet. Let it cool down slowly inside. This helps avoid any sudden temperature changes that could lead to a collapse.
After all that waiting and watching, when you finally take your pavlova out, it should look like a masterpiece. The outside should be crisp, while the inside remains soft and fluffy, ready to be topped with whipped cream and fresh fruits. It’s like the grand finale of a show, and you get to enjoy the fruits of your labor (pun definitely intended). So remember, the oven’s not just a tool; it’s your partner in this baking dance. Treat it well, and it’ll reward you with a pavlova that’ll have everyone swooning!
A Cloud of Celebration: Assembling Your Masterpiece
Alright, so you’ve whipped up your pavlova base, and now it’s time for the fun part—assembling your masterpiece! I mean, if there’s one thing we can all agree on, it’s that putting the final touches on a dessert is like dressing up for a party. You want it to shine, right?
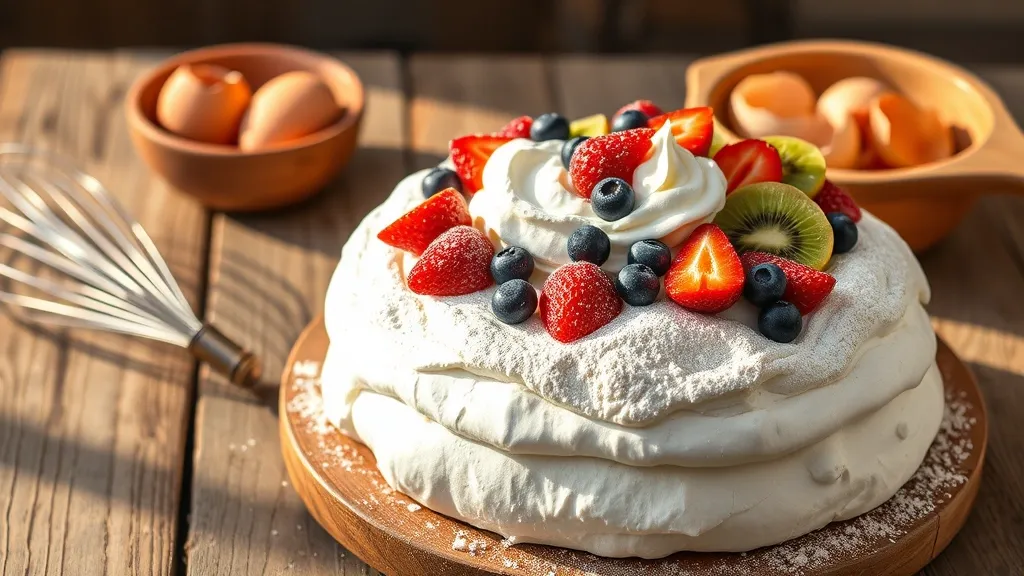
First off, let’s talk about the meringue itself. Once it’s cooled down, it should be all crispy on the outside and marshmallow-y in the center. Seriously, if you’ve done it right, that texture is going to be your best friend. Now, gently transfer that cloud of meringue onto a serving plate. I usually flip it upside down, so the smooth side is up—just a little trick I picked up. Don’t stress if it cracks a bit; that just adds character, like the wrinkles on my grandma’s face. Each one tells a story!
Now, let’s get to the toppings! You can go wild here, but I’m a sucker for fresh whipped cream. Whip it up until it’s fluffy and spread it generously over your meringue. It’s like giving your pavlova a cozy blanket. And hey, if you’ve got some vanilla extract lying around, toss a splash in there. Makes everything taste a bit fancier, ya know?
- Fruits: Berries, kiwis, or passionfruit are my go-tos. They add that vibrant splash of color and tangy flavor that balances all that sweetness. Just slice them up and scatter them like confetti. Who doesn’t love a good confetti moment?
- Drizzle: A little drizzle of chocolate or caramel sauce can take it to the next level. Just don’t go overboard, or your pavlova might end up looking like it’s been through a messy art project.
- Nuts: If you’re feeling fancy, some toasted nuts can add a nice crunch. I sometimes sprinkle on some chopped pistachios for that pop of color and flavor.
Once you’re done layering all these goodies, stand back and admire your work. Seriously, take a moment. You’ve just created something beautiful. You could totally take a picture for Instagram or just enjoy it in the moment—no pressure!
And remember, pavlova is meant to be enjoyed fresh, so dig in right away! Gather your friends and family around, because this dessert is all about sharing. Plus, it’ll be a great excuse to show off your culinary skills. Just be ready for the compliments (and maybe a few requests for the recipe!).