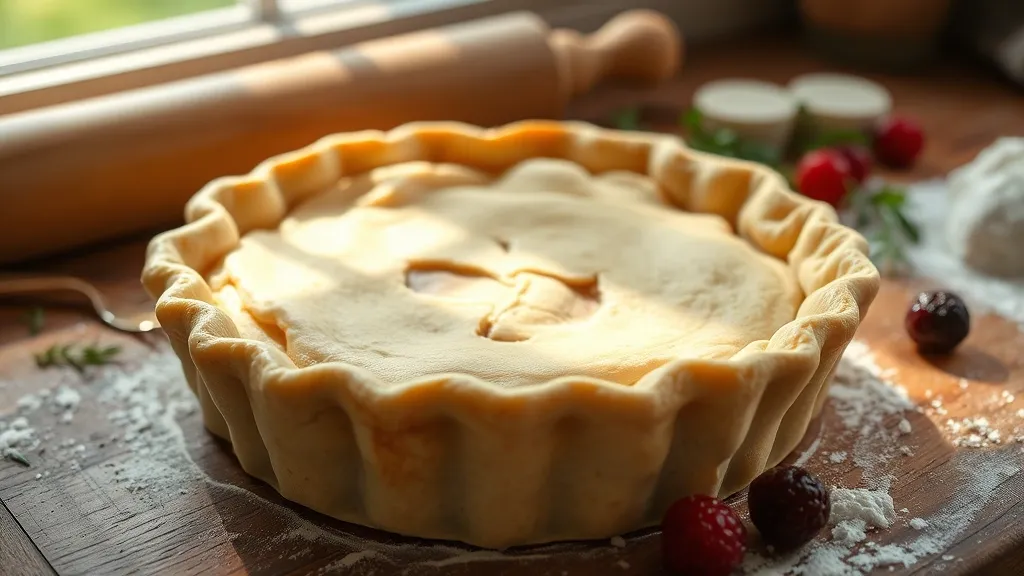
The Science of Flakiness: Unpacking the Magic Behind Pie Crust
Alright, let’s dive into the science behind that glorious, flaky pie crust we all crave. I mean, who doesn’t love that satisfying crunch when you take a bite? It’s like the crust is giving you a little high-five, saying, “You made the right choice!” But what’s the secret sauce that makes it so flaky and buttery? Let’s break it down.
First off, it’s all about the fat. When you mix in butter (or lard, if you’re feeling adventurous), you’re not just adding flavor; you’re creating layers. Here’s the deal: as the fat melts in the oven, it creates steam, which pushes layers of dough apart. This is where the magic happens. It’s like a little party in your pie crust! The more layers, the flakier it gets. So, don’t be stingy with the butter, folks.
Next, we’ve got gluten. Now, gluten has a bit of a bad rep, but hear me out. When you mix flour with water, gluten forms, and it gives the dough structure. But too much gluten can lead to a tough crust, and nobody wants that. The trick is to mix just enough to bring everything together without overdoing it. Think of it like a dance—you want to find the right rhythm without stepping on anyone’s toes.
- Use cold ingredients: This helps keep the fat solid until it hits the oven.
- Don’t overwork the dough: Mix it just until it comes together. Trust me, your crust will thank you.
- Chill, chill, chill: Let your dough rest in the fridge. It’s like a spa day for your crust!
And then there’s the temperature thing. Baking at the right temp is crucial. You want that initial blast of heat to create steam quickly, so your layers can separate and puff up. It’s like giving your pie crust a little pep talk before it hits the oven. “Go out there and be flaky!”
So, the next time you whip up a pie crust, remember it’s not just about combining ingredients; it’s about understanding the science behind it. With a bit of practice, you’ll be the pie crust guru in no time. And who knows? Maybe you’ll even have people asking for your secret recipe—just don’t tell them it’s all about the science and a little bit of love!
Butter, Flour, and a Pinch of Love: Crafting Your Dream Dough
Alright, let’s dive into the magical world of pie crusts! It might sound simple, but there’s an art to it that makes it oh-so-special. You’ve got your butter, flour, and a sprinkle of love—literally. I mean, who doesn’t want a pie crust that feels like a warm hug? So, let’s break this down.
First off, the butter. Ah, butter! The hero of our pie story. You wanna use cold, unsalted butter for that perfect flaky texture. I can’t stress this enough—cold is key! If the butter’s too warm, you’ll end up with a sad, sad crust. I usually pop my butter in the freezer for about 15 minutes before I start. Pro tip: cut it into small cubes first. It mixes in way better, and you don’t have to wrestle with it later.
Now, onto flour. All-purpose flour is your go-to here. Some folks swear by pastry flour, but let’s be real, all-purpose does the job just fine. Just make sure you’re measuring it right. Spoon it into your measuring cup and level it off. Don’t scoop straight from the bag; you might end up with a flour mountain and a crust that doesn’t hold up.
Next, let’s talk about the secret ingredient: that pinch of love. Okay, maybe it’s not a secret, but you gotta put some heart into your dough! I mean, if you’re just slapping it together, it’s gonna taste like it. So, as you mix your ingredients, think about the people you’re making this for. Picture their happy faces when they bite into your flaky masterpiece. It really does make a difference!
- Mix the dry ingredients first: flour, a bit of salt for flavor, and a dash of sugar if you’re feeling fancy.
- Then, cut in that cold butter—use a pastry cutter or your fingers. It’s a little messy, but hey, that’s part of the fun!
- Once you’ve got a crumbly texture, add ice water—just a few tablespoons at a time—until it comes together.
Trust your instincts! If it feels too dry, add a splash more water. If it’s too sticky, sprinkle in a bit more flour. You want it to be soft, but not a gooey mess. Wrap it up in plastic wrap and let it chill in the fridge for at least 30 minutes. This step is crucial! It relaxes the gluten and gives you that tender crust we all crave.
So there you have it! With butter, flour, and a pinch of love, you’re well on your way to crafting the dream dough for your perfect pie crust. Now, go on and show that dough who’s boss!
Rolling with the Punches: Techniques for a Flawless Finish
So, you’ve got your pie crust dough all prepped and ready to go, but now comes the fun part: rolling it out. Honestly, rolling dough can feel a bit like a dance—sometimes you’re in sync, and other times, you’re stepping on your own toes. Don’t stress, though! Here are some tips to help you glide through this process with ease.
- Chill Out: Seriously, give your dough some time in the fridge. A chill dough is easier to roll and handle. Plus, it helps maintain that flaky texture we all crave. If you’re in a rush, pop it in the freezer for about 15 minutes.
- Flour Power: Don’t be shy with the flour! Lightly dust your work surface and rolling pin to prevent sticking. But, try not to go overboard—too much flour can make your crust tough. It’s all about balance, kinda like life, you know?
- Roll from the Center: Start rolling from the center and work your way outwards. Think of it like spreading good vibes! This method helps you achieve an even thickness and avoids those awkward, lumpy edges. And hey, if you end up with a quirky shape, just call it artisanal. You’re a pie artist now.
- Don’t Overwork It: If the dough starts to feel warm or sticky, take a break. Let it rest! Remember, we want flaky, not tough. If you keep rolling it out like it owes you money, you’ll end up disappointed.
- Patch It Up: If you tear your dough (and let’s be real, it happens to the best of us), don’t panic. Just patch it with some extra dough. It’s like putting a band-aid on a scraped knee—totally fixable!
Once you’ve rolled it out to the desired thickness, gently transfer it to your pie dish. I like to fold it in half, then in half again to make it easier to move. Unfolding it in the dish feels like a mini magic trick. Just remember, practice makes perfect! Every pie you make is a step towards pie crust mastery. And if it doesn’t turn out perfect the first time, just remember: even the best bakers have their off days (I mean, have you seen some of those baking shows?).
So, roll with the punches, have some fun, and soon enough, you’ll be serving up slices of flaky, buttery bliss that’ll have everyone coming back for seconds. Happy baking!
Baking Bliss: Transforming Raw Ingredients into Pie Perfection
Alright, let’s get into the fun part—turning those humble raw ingredients into something that’ll make your taste buds sing. I mean, who doesn’t love a good pie? It’s like a warm hug on a plate! But before we dive into the oven, let’s take a moment to appreciate what we’re working with.
First off, flour. It’s the backbone of our pie crust. I usually go for all-purpose flour because it’s versatile and easy to find. Plus, it gives a nice balance of structure and tenderness. But hey, if you wanna experiment with whole wheat or even gluten-free options, go for it! Just remember, every flour acts a little differently, and that might change your game a bit.
Then there’s the butter—ah, the magical ingredient! I can’t stress enough how much butter adds to that flaky, melt-in-your-mouth texture. Seriously, if you’re tempted to use margarine or something, just don’t. You want the real deal here. Cold butter is the trick, though. I like to cut it into cubes and throw it in the freezer for a bit before mixing. It helps create those lovely little pockets of fat that make the crust flaky. Yum!
Now, let’s not skip over the salt. I know it seems small, but it’s a flavor enhancer, folks! Don’t be scared to sprinkle a bit in there. And then there’s water—just enough to bring it all together. I usually use ice-cold water because it keeps everything nice and chilled, which is key for that flakiness we’re after.
- Flour: The backbone of your crust.
- Butter: Go for the real stuff—cold and cubed!
- Salt: A little pinch goes a long way in flavor.
- Water: Keep it ice cold for best results.
Mixing these ingredients might feel a bit like a science experiment, but trust me, it’s more of an art. You want to mix until you see pea-sized bits of butter. Then, when you think you’re done, mix a little more! Yeah, I know—it feels counterintuitive, but it’s about finding that sweet spot.
Once you’ve got your dough, it’s time for a little chill time in the fridge. Don’t skip this step, or you’ll end up with a crust that’s tougher than a rock. Give it at least 30 minutes to relax. I usually take this time to contemplate life choices, or maybe just snack on some leftover pie filling. No judgment here!
And there you have it! You’ve transformed those simple ingredients into a pie crust that’s ready to take on the world—or at least your kitchen. Next up, we’ll dive into the filling, but trust me, this crust is gonna steal the show!