Rising to the Occasion: The Science Behind Fluffiness
Alright, let’s dive into the fluffy goodness of yeast rolls. You might be wondering, “What makes these rolls so light and airy?” Well, it’s all about the science of yeast and a little magic in the kitchen!
First up, yeast. This tiny organism is a powerhouse when it comes to baking. When you mix yeast with warm water and sugar, it gets all excited and starts to eat up the sugar. This process, called fermentation, produces carbon dioxide gas. Yup, that’s right! The same stuff that makes your soda fizzy is what gives your rolls that beautiful rise.
Now, when those little gas bubbles form, they get trapped in the dough. As the dough rises, this creates a network of gluten. Think of gluten as the stretchy part of your dough, kind of like a cozy sweater that holds everything together. If you’ve ever tried to make bread and ended up with a brick instead, you probably didn’t give your dough enough time to develop that gluten network. Patience is key here, folks!
- Tip: Knead your dough for about 10 minutes. It might feel like a workout, but trust me, it’s worth it!
- Don’t skip the second rise. That’s when the magic really happens.
So, once you’ve gotten that dough nice and fluffy, it’s time for baking. The heat in the oven causes the gas bubbles to expand even more, turning your dough into those gorgeous rolls that practically beg to be slathered with butter. Seriously, is there anything better than warm bread with a pat of butter melting on top? I think not!
But here’s a little secret: the fluffiness doesn’t just come from yeast alone. The fat you add, whether it’s butter or oil, plays a huge role too. It tenderizes the dough and gives that rich flavor that makes your rolls irresistible. I mean, who doesn’t want a buttery, fluffy roll to accompany their dinner?
In conclusion, the art of making fluffy yeast rolls is all about understanding the process and giving it some love. It’s not just baking; it’s a science experiment in your kitchen! So roll up your sleeves, grab that flour, and let’s make some magic happen!
The Ingredients That Elevate: More Than Just Flour and Water
Alright, let’s get real about the magic behind those fluffy yeast rolls. Sure, you could just toss together some flour and water, but where’s the fun in that? It’s like trying to make a pizza without cheese—just not gonna hit the spot! So, let’s dive into the ingredients that really take these rolls from “meh” to “OMG, what’s in these?”
- Flour: First up, we’ve got our star player: flour. All-purpose flour works just fine, but if you want to elevate your game, go for bread flour. It’s got higher protein content, which means more gluten. More gluten equals chewier, fluffier rolls. Who doesn’t want that?
- Yeast: Next, let’s chat about yeast. It’s the little organism that could! There are two main types: active dry yeast and instant yeast. I personally love instant yeast because it’s super easy to use—no waiting around for it to bloom. Just mix it right in and let the magic happen. You could say it’s like the superhero of baking!
- Milk: Now, let’s not forget about milk. Using warm milk instead of water adds richness and a touch of sweetness. Plus, it helps create that tender crumb we all crave. Honestly, I can’t imagine a roll without it. It’s like the secret handshake of the baking world.
- Butter: And then there’s butter. Oh, glorious butter. It not only adds flavor but also makes your rolls extra soft and luscious. I mean, who wouldn’t want to slather a warm roll with even more butter afterward? It’s practically a rite of passage.
- Sugar: Don’t forget sugar! It feeds the yeast, helping it do its thing. Just a little bit can make a big difference. You don’t want your rolls to be sweet like dessert, but just enough to give that nice golden color and a hint of flavor.
- Salt: Finally, we have salt. Yes, it’s essential! It balances the flavors and controls the yeast’s activity. Too little and your rolls might just flop; too much, and you’re left with a salty disaster. It’s all about finding that sweet spot!
So, there you have it! Each ingredient plays a critical role in creating those pillowy rolls you’ll be proud to serve. The next time you’re in the kitchen, just remember that every little detail counts. Happy baking, and may your rolls rise to the occasion!
Knead for Speed: Techniques to Master the Perfect Roll
Alright, let’s get down to the nitty-gritty of kneading. I mean, it sounds simple, right? Just slap the dough around a bit and call it a day. But there’s a bit more to it if you wanna achieve those fluffy, melt-in-your-mouth yeast rolls that’ll have everyone begging for seconds (or thirds, no judgment here!).
First off, don’t be afraid to get your hands dirty. Seriously, there’s something therapeutic about feeling that dough squish between your fingers. Just make sure your hands are clean—nobody wants a surprise ingredient, right?
Now, when it comes to kneading, you want to think of it like a workout for your dough. You’re not just pressing it; you’re giving it a little love. Start by flattening the dough with your palms, then fold it over itself and push down with the heels of your hands. Repeat this for about 8-10 minutes. Yeah, I know that sounds like a lot, but trust me, it’s worth it! You’ll know you’re doing it right when the dough starts to feel smooth and elastic—kind of like a good pair of leggings, if you catch my drift.
- Tip 1: If your dough is sticking to the counter like a toddler clinging to their favorite toy, sprinkle a little flour as you go. But don’t go overboard; we want it to stay moist and fluffy.
- Tip 2: Use the “windowpane test.” Sounds fancy, right? Just take a small piece of dough and stretch it gently. If it can stretch into a thin membrane without tearing, you’re golden!
- Tip 3: If you’re feeling adventurous, try using a stand mixer with a dough hook. It’s like having a sous-chef that doesn’t complain about the workload. Just don’t forget to scrape down the sides now and then!
And hey, if you find yourself getting bored, throw on some music! I find that a good playlist can really pump up the energy in the kitchen. Just don’t get too carried away and start dancing with the dough—trust me, it’s not as fun as it sounds.
Once you’ve kneaded your dough to perfection, let it rise in a warm, draft-free spot. This is where the magic happens! Watching that dough puff up is oddly satisfying, like watching a balloon inflate. Just remember to cover it with a damp cloth or plastic wrap so it doesn’t dry out.
So there you have it! Kneading doesn’t have to be a chore. With a little practice and a sprinkle of enthusiasm, you’ll be on your way to mastering the perfect roll. Happy baking!
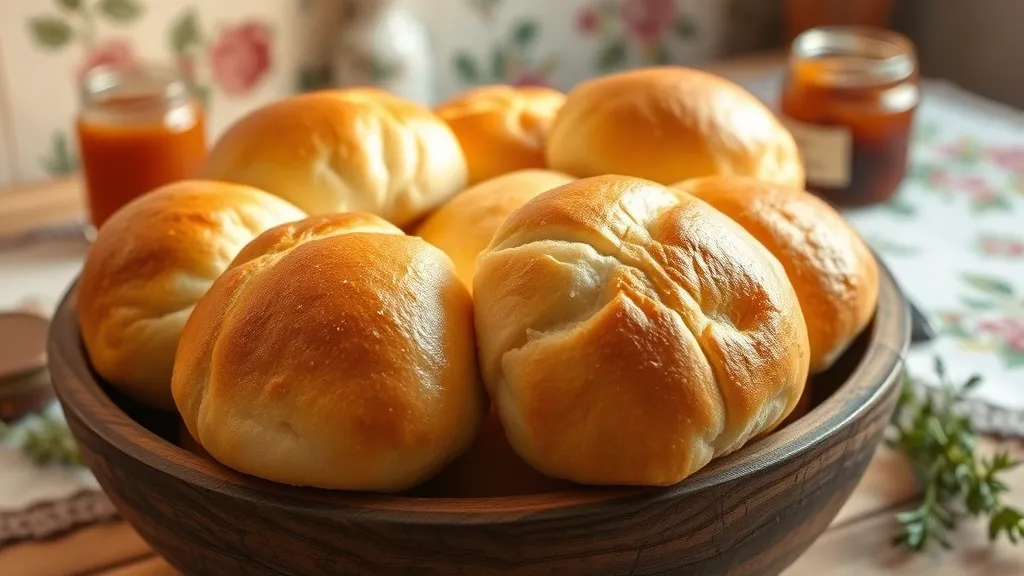
The Grand Unveiling: Serving Your Yeast Rolls Like a Pro
Alright, so you’ve baked these fluffy yeast rolls that could make even the most serious food critic swoon. Now comes the fun part: serving them up! Trust me, presentation matters. You could have the best rolls in the world, but if you just toss them on a plate, they might not get the love they deserve.
First things first, think about your serving dish. A nice basket lined with a cute cloth napkin? Yes, please! It adds that cozy, homemade vibe, which is exactly what you want. Plus, who doesn’t love a good bread basket? It’s like the culinary version of a warm hug.
Now, let’s talk toppings. Sure, butter is a classic, but why not jazz it up a bit? You can whip up some garlic herb butter or even a sweet honey butter if you’re feeling fancy. A little sprinkle of sea salt over the top right before serving can really make those rolls pop. It’s like the cherry on top, but, you know, for bread.
- Garlic Herb Butter: Mix some softened butter with minced garlic, fresh herbs like parsley or chives, and a pinch of salt. Spread that goodness on warm rolls, and watch them disappear!
- Honey Butter: Blend butter with honey and a dash of cinnamon. It’s sweet, it’s creamy, and it’s basically a party in your mouth.
When you’re ready to serve, don’t be shy! Place those rolls in the center of the table like they’re the main event. Seriously, make a big deal out of it. Everyone loves bread, and your guests will definitely appreciate the effort. And hey, if you’ve got any leftovers (which is a big “if” because they’re so good), just know that they make for an epic breakfast the next morning. Toasted yeast rolls with jam? Yes, please!
And here’s a little pro-tip: if you want to keep your rolls warm while dinner’s being served, cover them with a clean kitchen towel. It’ll help retain that heat and softness, so when your guests finally dig in, they’ll be greeted with rolls that are still nice and toasty. No one likes a cold roll—it’s just sad.
So, there you have it! Serve those yeast rolls with style, and you’ll not only be the star of dinner, but you’ll also create a warm and inviting atmosphere that’ll have everyone talking long after the last roll is gone. Happy serving!