The Magic Elixir: Unveiling the Mystique of Kombucha
Kombucha—just saying it sounds kinda magical, right? It’s like a potion straight outta a fairy tale, bubbling and fizzing with all sorts of goodness. Seriously, this stuff has been around for ages, and it seems like everyone’s jumping on the bandwagon. But what’s the deal with this fermented tea? Let’s dive into the mystique of kombucha and see what makes it so special.
First off, it’s not just a trendy drink you can find at your local health food store. Kombucha is brewed from tea, sugar, and a SCOBY (that’s a Symbiotic Culture Of Bacteria and Yeast, if you’re curious). Sounds gross, but trust me, it’s where the magic happens! The SCOBY eats the sugar and turns it into all those fizzy bubbles and tangy flavors we love. It’s like a little science experiment in a jar, and honestly, who doesn’t love a good DIY project?
Now, let’s talk health benefits, because that’s a big reason people are all about kombucha. It’s loaded with probiotics, which are great for your gut health. You know, the stuff that helps keep everything running smoothly down there. Plus, it’s packed with antioxidants, which are like tiny superheroes fighting off the bad guys in your body. So, sipping on this elixir might just make you feel like you can conquer the world—or at least your to-do list.
- Boosts digestion: That probiotic goodness can really help your tummy out.
- Increases energy: Instead of a sugary energy drink, why not go for something that’s both refreshing and revitalizing?
- Supports immune health: With all that fermentation magic, your immune system just might thank you!
But let’s keep it real—kombucha isn’t for everyone. Some people find the taste a bit… well, funky. It’s kinda like that friend who’s always trying to convince you to like their weird favorite band. You either get it, or you don’t! And if you’re not into sour flavors, you might wanna ease into it or try a flavored one first.
In the end, whether you’re a kombucha lover or just curious, there’s no denying its charm. It’s a drink with history, personality, and a whole lotta fizz. If you’re thinking about brewing your own, get ready for a fun ride. Who knows? You might just end up with your own magical elixir!
Gathering Your Potion Components: A Beginner’s Shopping List
Alright, so you’re ready to dive into the magical world of kombucha brewing! The first thing we gotta do is gather up all the components you’ll need. Think of it like gathering ingredients for a potion—only this one’s way tastier (and less likely to explode, I promise!). Here’s what you’re gonna need:
- SCOBY – This is the star of the show! SCOBY stands for Symbiotic Culture Of Bacteria and Yeast. Sounds fancy, right? You can usually get one from a friend who brews or buy one online. Just be careful to choose a healthy one—no one wants a funky SCOBY.
- Tea – Black tea is the classic choice, but green tea works too. Just steer clear of flavored teas because they can mess with the fermentation process. Think of it as the base of your kombucha cake—you wouldn’t use chocolate for a vanilla cake, would ya?
- Sugar – Yep, good ol’ sugar! It may sound counterintuitive since we’re all about healthy drinks these days, but the SCOBY needs sugar to do its thing. Keep it simple and use white granulated sugar—not the fancy stuff.
- Water – Filtered or distilled water is best. Tap water can have chlorine or other chemicals that might not play nice with your brew. If you can taste it, your SCOBY probably won’t like it either!
- Starter Tea – This is just some already fermented kombucha, either from a previous batch or store-bought. It helps kickstart the fermentation process. It’s like a little booster shot for your brew!
- Glass Jar – You’ll need a big ol’ glass jar to house your brewing kombucha. Make sure it’s at least a quart size. No metal or plastic containers—those can mess with the fermentation too. Think of it as your kombucha’s cozy home.
- Cloth and Rubber Band – A breathable cloth (like a coffee filter or a clean dish towel) to cover the jar, plus a rubber band to keep it secure. You want to keep the bugs out while allowing your kombucha to breathe. Trust me, no one wants a fruit fly cocktail.
And that’s about it! With these components, you’re well on your way to brewing your first batch of kombucha. It’s honestly a fun process, and you’ll feel like a total wizard once you see that SCOBY doing its thing. Just remember, the first batch might be a little wonky, but that’s all part of the learning curve. Happy brewing!
The Art of Fermentation: Crafting Your First Batch with Flair
Alright, let’s dive into the magical world of fermentation. Seriously, it’s like a science experiment you can drink! Making your first batch of kombucha is super exciting, and trust me, it’s way easier than it sounds. You don’t need a PhD in microbiology—just a little patience and a sense of adventure.
First things first, let’s talk about your SCOBY. It’s that weird, rubbery-looking pancake that’s going to do all the hard work for you. SCOBY stands for Symbiotic Culture Of Bacteria and Yeast. A mouthful, right? But don’t let that scare you. This little guy is your best friend in the brewing process. If you’re unsure where to get one, you can buy one online or ask a friend who brews—SCOBYs are like a cult, and once you have one, you’ll end up with more than you can handle!
Now, let’s get down to the nitty-gritty. Here’s what you’ll need:
- 1 SCOBY
- 1 cup of sugar
- 8 tea bags (black, green, or a mix)
- 2 cups of starter tea (from a previous batch or store-bought kombucha)
- Water
Start by brewing your tea. Boil about 4 cups of water, toss in the tea bags, and let it steep for about 10-15 minutes. Then, stir in the sugar until it dissolves. You’ll want to let this sweet tea cool down to room temperature—nobody wants to cook their SCOBY, right?
Once it’s cool, pour it into a large glass jar, add the starter tea, and then gently place your SCOBY on top. It might float, sink, or do a little dance; just let it do its thing! Cover the jar with a breathable cloth (like a dish towel or coffee filter) and secure it with a rubber band. This keeps the bugs out but lets your kombucha breathe—because, you know, even fermented tea needs fresh air.
Now comes the waiting game. Find a nice, warm spot in your kitchen (not too hot, not too cold—think Goldilocks). Let it ferment for about 7 to 14 days. The longer you wait, the more tangy and fizzy it’ll get. I usually give it a little taste after a week; if it’s too sweet, let it go a bit longer. It’s like a kombucha guessing game!
When it’s ready, you can bottle it up and add flavors if you want—think ginger, berries, or even herbs. Just make sure to leave a little bit of kombucha in the jar to kickstart your next batch. It’s a cycle of deliciousness!
So, there you have it! The art of fermentation doesn’t have to be intimidating. It’s all about experimenting and having fun. Your first batch might be a little funky, but hey, that’s part of the charm of brewing your own kombucha. Cheers to your new hobby!
Sipping Success: Flavoring and Bottling Your Brewed Masterpiece
So, you’ve brewed your kombucha and it’s bubbling away like a little science experiment. Now comes the fun part: flavoring and bottling your delicious creation! Seriously, this is where you can get creative and make your kombucha a true reflection of your taste buds.
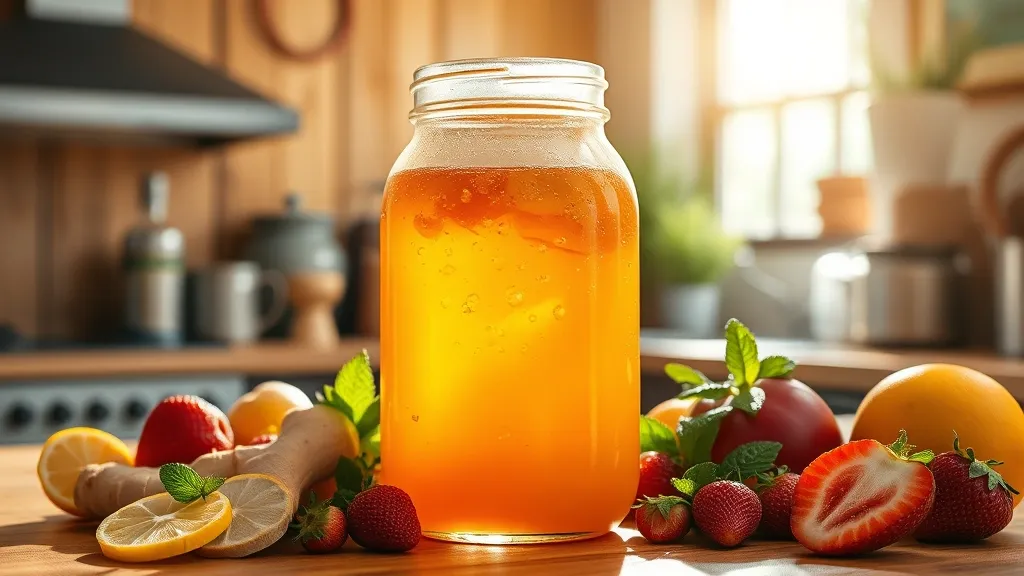
First off, let’s talk about flavoring. You can keep it simple or go all out. Some folks love classic ginger or lemon, while others dive into wild combinations like lavender and blueberry. The world is your oyster! Or, well, your tea. Just remember, fresh fruits, herbs, and spices are your best friends here. You can toss in slices of ginger, fresh mint, or even a handful of berries. Just be mindful not to go overboard; a little can go a long way in the flavor department.
Once you’ve chosen your flavors, it’s time to add them to your brewed kombucha. You can do this during the second fermentation phase, which is basically when your kombucha gets fizzy and fabulous. Grab some clean bottles (and I mean clean—nobody wants a surprise flavor from last week’s smoothie) and fill them up, leaving some headspace at the top. Add your flavorings here. For instance:
- 1-2 slices of ginger for a zesty kick
- A handful of berries for sweetness
- A sprig of mint for refreshment
After you’ve added your flavors, cap those bottles up and let them sit at room temperature for another 3 to 7 days. Keep an eye on them! You don’t want to burst a bottle and have a kombucha explosion in your kitchen. That’s not the kind of “pop” we’re looking for.
And then there’s bottling. Once you’ve reached your desired fizz, it’s time to strain your kombucha into clean bottles. You can use a funnel if you’re feeling fancy, or just pour it in and hope for the best. No judgment here! If you like a little sediment, go for it. If not, a fine mesh strainer can help keep things smooth.
Finally, don’t forget to label your bottles. It’s not just for organization; it’s also a fun way to remember what you made. Who knows? You might want to recreate that killer peach and basil flavor down the line! Once they’re sealed up, pop them in the fridge to chill. And then… the moment you’ve been waiting for: grab a glass, pour, and enjoy the fruits of your labor!
Cheers to your homemade kombucha journey! You’ve earned it!