The Magic of 00 Flour: Why Your Pizza Deserves It
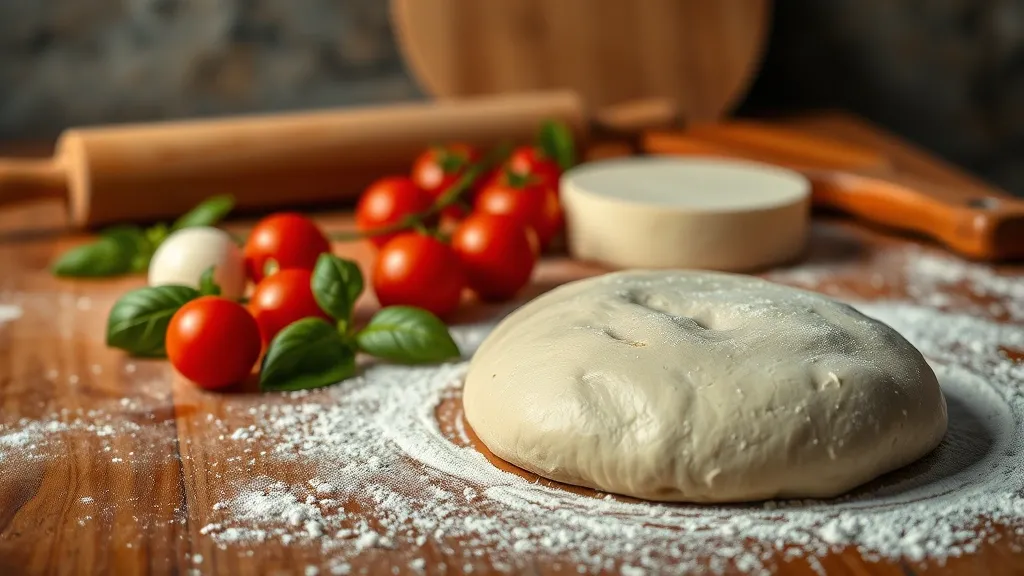
Okay, let’s talk about 00 flour—this stuff is like the secret weapon in your pizza-making arsenal. You might be wondering, “What’s the big deal with 00 flour?” Well, let me tell ya, it’s not just some fancy Italian gimmick. This flour is ground super fine, which means it gives your pizza dough that dreamy, silky texture that’ll make you feel like a pro pizza chef, even if your only experience is ordering takeout.
First off, the protein content in 00 flour is usually around 11-12%. That’s pretty perfect for making pizza dough because it strikes a balance between chewiness and tenderness. You want your crust to have that nice bite but not be like chewing on a rubber band. Nobody wants that, right? With 00 flour, you can achieve that perfect crust that’s crispy on the outside and soft on the inside. It’s like a warm hug for your taste buds.
Another cool thing about 00 flour is how it reacts to high heat. If you’re lucky enough to have a pizza oven or even just a super-hot regular oven, this flour can handle it like a champ. It helps create those beautiful charred spots on your crust that are often the hallmark of authentic Neapolitan pizza. You know, the kind that makes you want to take a picture and post it on Instagram with a #FoodPorn hashtag? Yeah, that’s the stuff.
But let’s not forget the flavor. 00 flour has a subtly sweet, nutty taste that’s just so much better than regular all-purpose flour. It’s like the difference between a boring old white bread sandwich and a freshly baked artisan loaf. You can totally taste the love and effort that goes into it. And when you add your favorite toppings, the combo is just magical.
- Great texture
- Perfect for high-heat cooking
- Enhanced flavor
In short, if you really wanna level up your pizza game, ditch the all-purpose flour and grab some 00 flour. Your pizza deserves it, and so do you. Trust me, once you go 00, you won’t wanna go back. It’s like finding out your favorite band has a secret album—you just can’t unhear it!
Knead to Know: Crafting Your Dough Like a Pro
Alright, so you’ve got your 00 flour ready, and you’re pumped to dive into making some pizza dough. But here’s the thing: kneading might sound like a simple task, but there’s a bit of an art to it. You know, like that time I tried to impress my friends with a fancy soufflé and it turned into a pancake. Yeah, let’s avoid that kind of disaster with our dough!
First off, when you start mixing your ingredients, don’t just dump everything in and expect magic. You’ll want to take your time, mixing flour, water, salt, and a pinch of yeast until they start to come together. Think of it like dating—initially messy, but with the right amount of patience, it can turn into something beautiful.
Once you’ve got a shaggy dough, it’s time to roll up those sleeves and get kneading. This is where you can really channel your inner pizza pro. Flour your surface lightly, and place that dough down. Now, you want to push it away from you with the heel of your hand—like you’re giving it a gentle shove towards greatness. Then fold it back over itself, give it a quarter turn, and repeat. Sounds easy, right? But trust me, it’s a workout! This is where the magic happens, developing that gluten structure that’ll give you the chewy crust we all crave.
- Tip 1: Knead for about 10 minutes. If your arms are sore, you’re doing it right!
- Tip 2: Don’t be afraid to add a sprinkle of flour if things get too sticky. Just don’t overdo it—nobody likes a floury dough.
- Tip 3: Pay attention to the texture. You want it smooth and elastic, not a sad, lumpy mess.
After you’ve kneaded your dough like a pro, let it rest. This part is super important. Cover it with a damp cloth and let it rise for at least an hour. It’s like giving your dough a spa day—seriously! This helps the gluten relax, which makes stretching it out later much easier. Plus, you can take this time to whip up some awesome toppings or just grab a snack. I mean, balance is key, right?
So, there you have it! Kneading isn’t just about getting a workout or showing off your culinary skills. It’s about building a foundation for your pizza masterpiece. And who doesn’t want to impress their friends with a killer pizza night? Now, let’s get that dough rising and the good vibes flowing!
Rising to the Occasion: The Art of Fermentation
So, let’s chat about fermentation, shall we? It sounds all fancy and scientific, but really, it’s just the magical process that turns your simple ingredients into something incredible. Think of it as the secret handshake to getting that perfect pizza dough. You know, the kind that makes your taste buds do a little happy dance? Yeah, that’s what we’re aiming for.
When it comes to making pizza dough with 00 flour, fermentation is where the magic really happens. It’s not just about letting the dough sit there while you scroll through social media. Nope, it’s a whole art form. You’ve got to give those yeast cells time to work their charm. They’re like tiny little chefs in your dough, and they need a little love and attention.
There are a couple of ways to go about fermentation. You can go the quick route with a faster rise, or you can take your time and do a slow fermentation. Personally, I’m all about that slow life. Letting the dough rise in the fridge overnight? Yes, please! It develops a deeper flavor that just can’t be rushed. Plus, it gives me more time to binge-watch my favorite shows. Win-win!
- Quick Rise: If you’re in a pinch and need pizza ASAP, mix your dough, let it rise for about 1-2 hours at room temperature, and you’re good to go. It’s not ideal, but sometimes life happens.
- Slow Fermentation: For the best flavor, let your dough chill in the fridge for at least 24 hours. The longer, the better! You’ll end up with a crust that’s crispy on the outside and chewy on the inside. Trust me, your pizza will thank you.
Now, don’t forget about the temperature. Yeast loves a warm, cozy environment. But too warm, and you’ll end up with a sad, deflated dough. Aim for around 75°F to 80°F (that’s about 24°C to 27°C for my metric friends). If your kitchen is hotter than that, maybe try to find a cooler spot or crank up the AC. Your dough will rise to the occasion, and you’ll get that perfect pizza crust.
In the end, fermentation is all about patience and a little bit of science mixed with a whole lot of love. So next time you’re whipping up a batch of pizza dough, remember to give it the time it deserves. You’ll be rewarded with a crust that’s so good, you might just start making pizza every night of the week. And hey, I won’t judge if you do!
Baking Brilliance: From Oven to Table, A Slice Above
Alright, so you’ve mastered the dough, right? Now it’s time to talk about the magic that happens when that beautifully crafted pizza dough hits the oven. Seriously, there’s something almost mystical about baking. It’s like watching a transformation unfold right before your very eyes. You start with a simple ball of dough, and then, poof! You’ve got a pizza that could make even the most hardened New Yorker shed a tear.
First things first, preheating your oven is key. I mean, we all know that, but it’s so easy to get sidetracked. You might be tempted to check your phone, or maybe start scrolling through your favorite food Instagram. Trust me, don’t do it! Get that oven cranked up to the highest setting—450°F to 500°F is where the magic happens. The hotter, the better. It’s like giving your pizza a spa day before it hits the table.
Once that oven is ready, it’s time to stretch out your dough. This part can be a bit tricky, but hey, it’s all about practice. Don’t be afraid to get your hands messy; that’s part of the fun! If you find yourself wrestling with the dough, just remember: it’s not a fight, it’s a dance. And if it rips? Just patch it up and keep going. Perfection is overrated, am I right?
- Preheat your oven: Get it nice and hot for that perfect crust.
- Stretch, don’t roll: Use your hands to shape the dough, it gives it character!
- Less is more: Don’t overload on toppings; let the dough shine.
Now, let’s talk toppings. This is where you can really let your personality come through. Whether you’re a classic Margherita kind of person or you like to experiment with pineapple (yes, I said it!), go for it! Just try not to overdo it. Too many toppings can weigh down your pizza and nobody likes a soggy slice.
After you’ve dressed your dough to your liking, slide that beauty into the oven. The aroma that fills your kitchen is out of this world. It’s like a warm hug from Italy, and you didn’t even need to book a flight. Just keep an eye on it; the baking time usually falls between 8 to 15 minutes, depending on your oven and how thick your crust is. You’ll know it’s ready when the cheese is bubbling and the crust is golden brown.
Once it’s done, let it cool for a minute—if you can resist! Then slice it up and serve. There’s nothing quite like the joy of sharing a homemade pizza with friends or family. So, grab a slice and dig in! You’ve earned it. Who knew baking could be this rewarding?